
There are a million ways to revise. And there are a million ways to use Scrivener. For my fiction writing, Scrivener offers flexibility and customization. I have found it malleable to fit whatever writing project I am working on at the time. If you haven’t used it, you would too, I bet.
No, I’m not a commercial for the Scrivener software. In fact, I would encourage anyone who gets overwhelmed with complex software to try Dabble or Novlr. Saying that, I think Scrivener is easy to use if you just keep it simple. The fancier bells and whistles are there if you need them.
One of those fancy bells and whistles is the snapshot function.
But never fear. I have broken down how to use the snapshot function in Scrivener in steps. More specifically, I will show you how I use it to keep track of my drafts for a scene.
What is a Snapshot in Scrivener?
A Snapshot is like taking a photo of my writing before I make big changes. It saves that version so I can look back at it—or even go back to it—later. It’s a safe way to experiment without fear of losing my previous work.
Think of it as Scrivener saying, “Don’t worry, I’ll remember what this looked like before you edited it.”
How do I get started?
You probably already know how to use Scrivener if you are interested in learning more about the snapshot feature, but here is a simple reminder of some of the terms I’ll be using.
- The left hand column is the binder. It’s a digital notebook where I see the “pages” of my novel in order.
- The middle column is the editor. This is where the magic happens. I compose rough drafts of scenes, outlines and final drafts in this space. I spend most of my time here.
- The right hand column is the one that people get scared of. It is the inspector. Today, I am going to talk about just one function of the inspector, that is the snapshot function, and how I use it to keep track of my drafts.
To get started, I create a text document in the binder. I write one scene per text document. For this novel, I’m calling each scene an “episode,” but most of the time I give a scene temporary title. I’ll combine my scenes into chapters later. Write the name of your scene in the field in the binder.
One thing I love about Scrivener is changing the size of the editor and the inspector. My preference is to make the editor and inspector about the same size. You adjust them to your liking.
Following are ten steps on using snapshots to keep track of your drafts. I’ve added a fake scene as an example. You should be able to enlarge the graphics if you click on them.
Let’s go.
1.
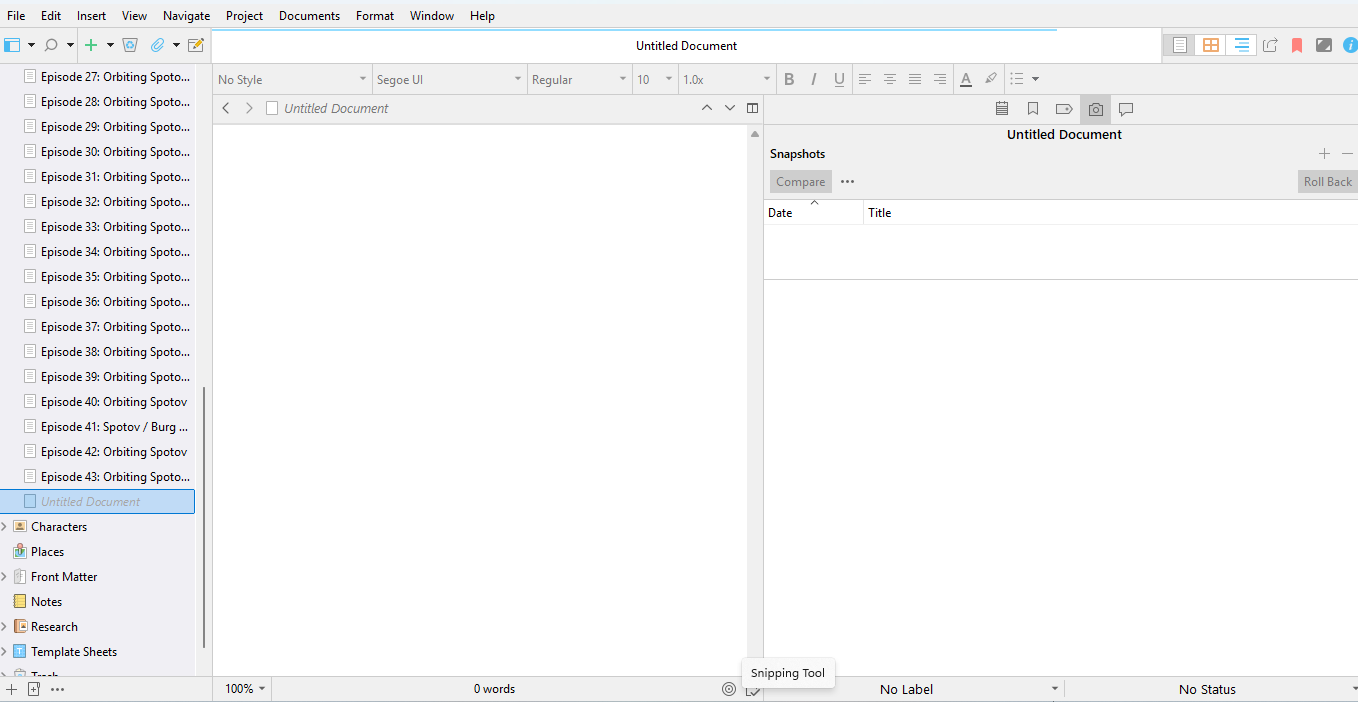
I create a new text document for the new scene.
2.
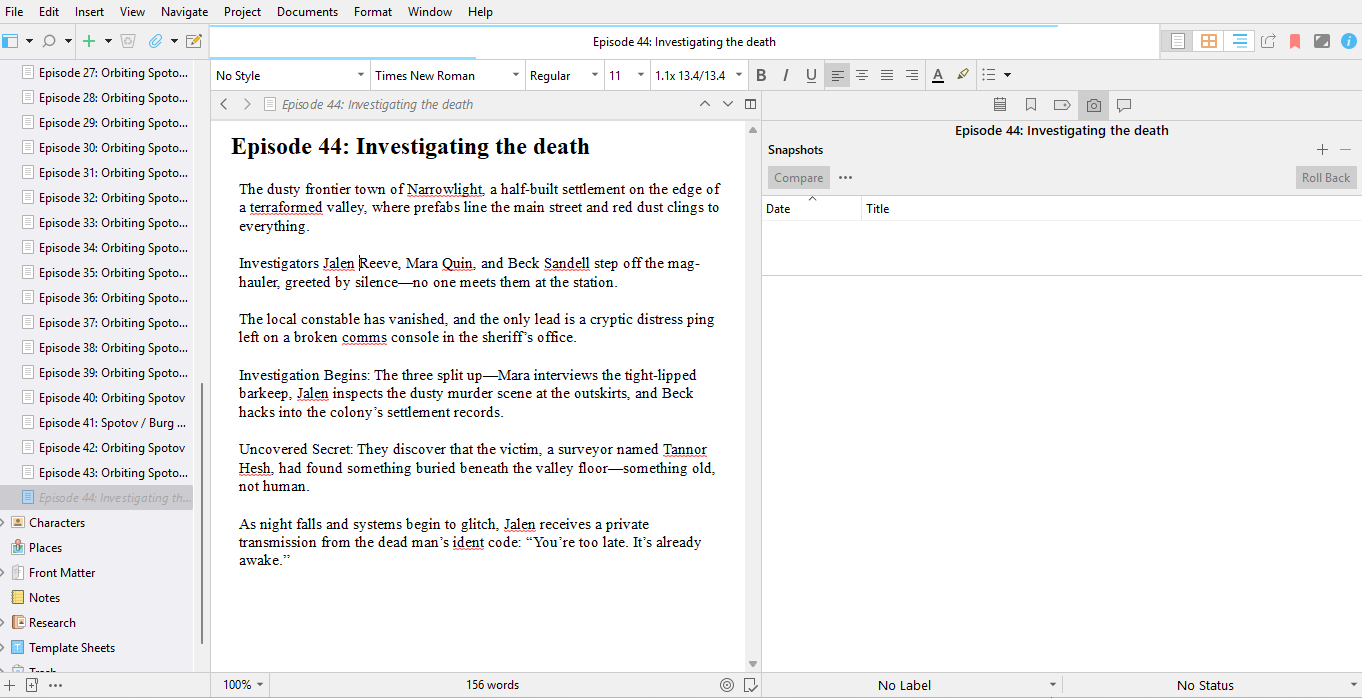
I write an outline or rough draft of the scene.
3.
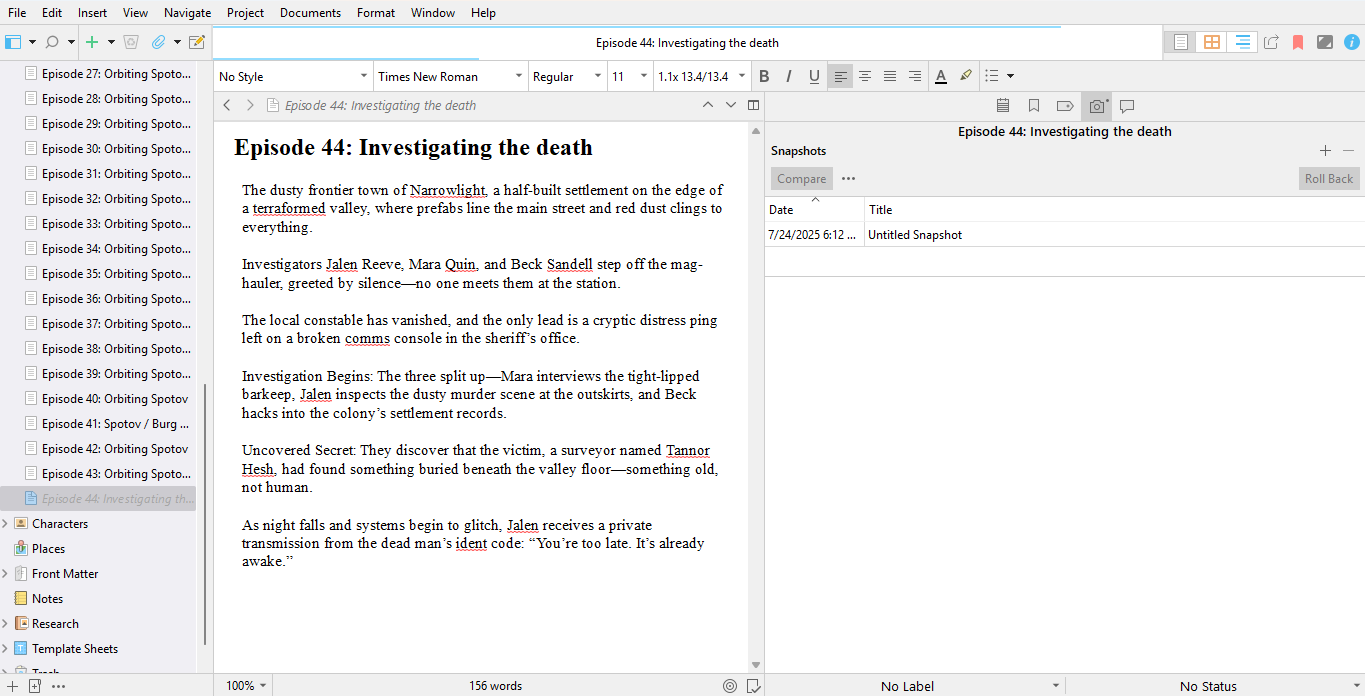
When finished with the outline, I take a snapshot by clicking on the camera icon on the right column near the top. Then I click on the “+” symbol on the very right. This snapshot will appear in the list with its date. It will be called “Untitled Snapshot.” If you ever want to delete a snapshot, select it and click on the minus symbol next to the “+” symbol.
4.
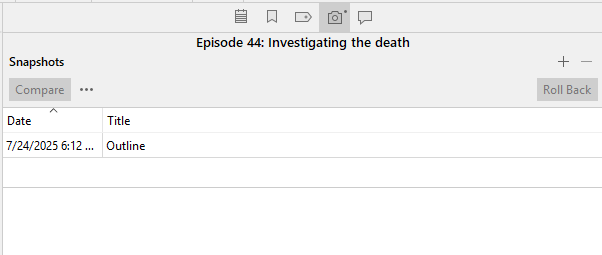
If I want, I can double click on the title and give it the name of my choice. I’m calling this first listing “Outline.”
5.
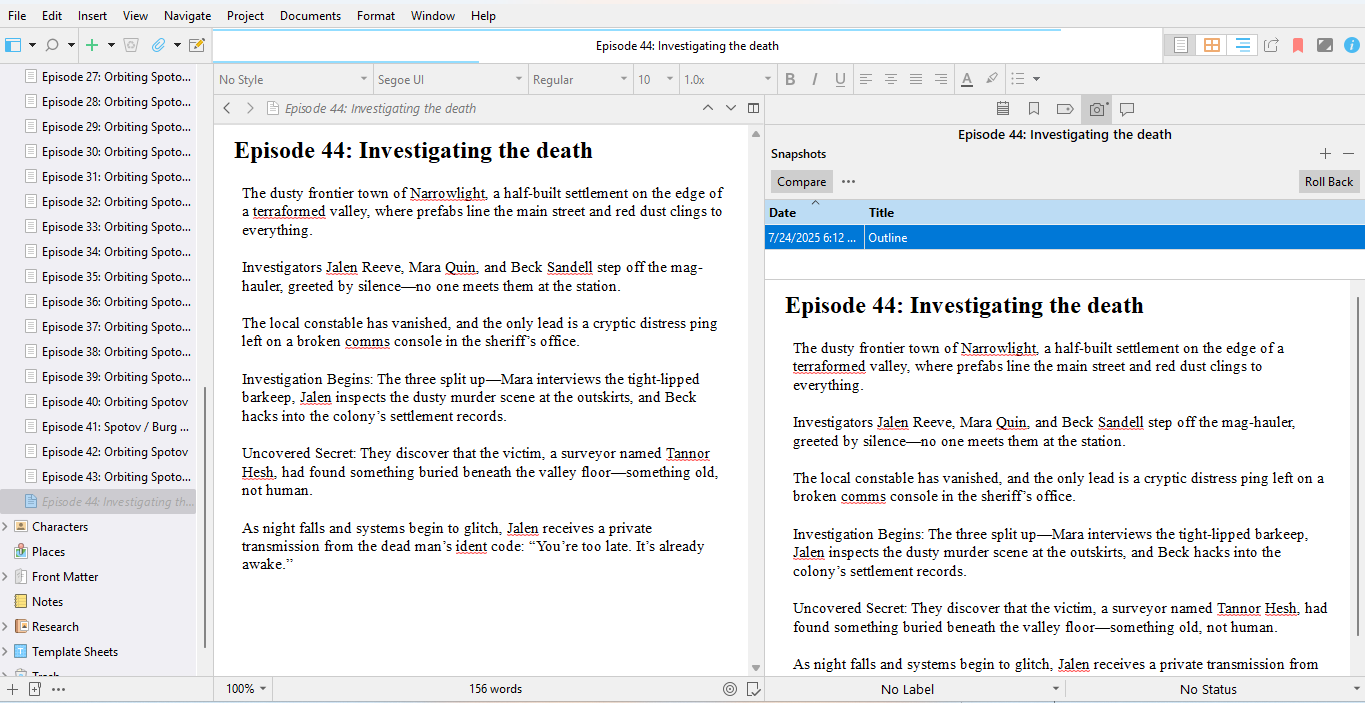
Notice when I click on the snapshot title, a copy of the outline appears below in the right-hand column. It is read-only at this point. See step 9 for instructions on how to copy and paste from a snapshot.
If I need to, I can click on the bar above “Episode 44: Investigating the death” and pull the snapshot up so I can see more of it.
6.
Now, I feel free to delete the rough draft in the editor column. I’m keeping the title for the next draft.
7.
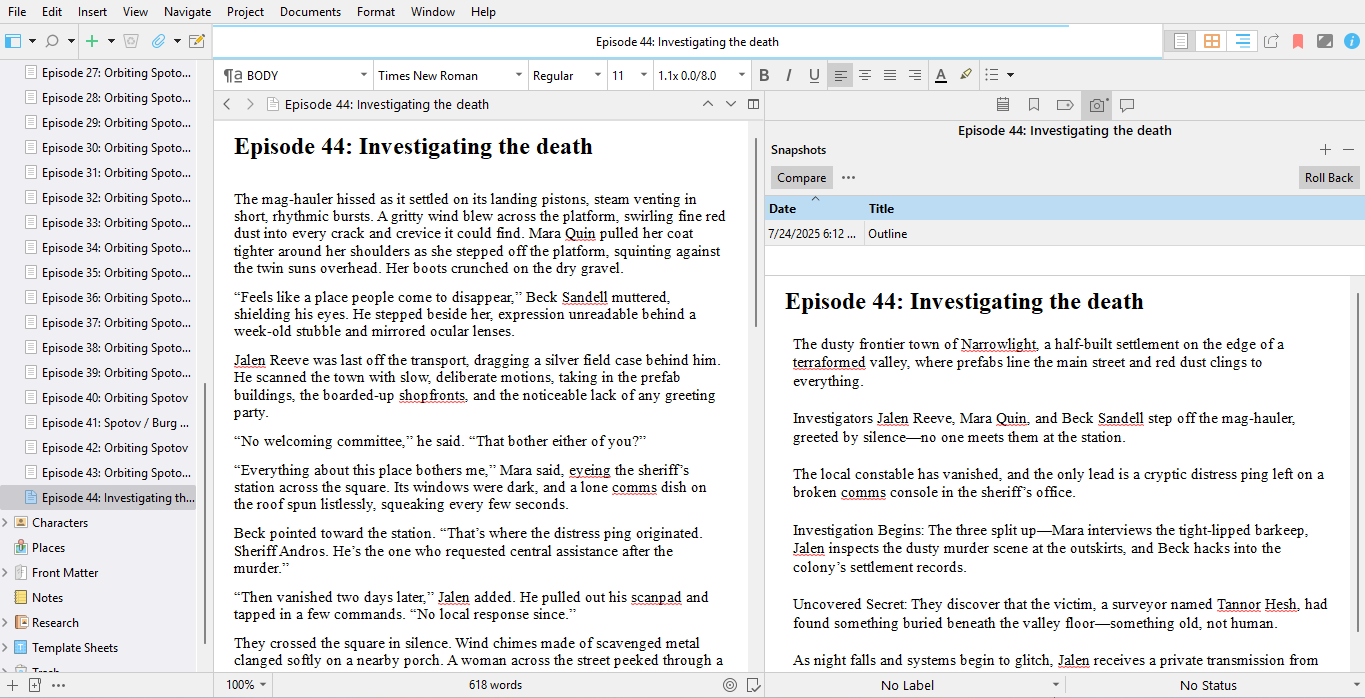
With the snapshot of my outline on the right, I can compose the first full draft of my scene in the editor (the middle column). Of course, I may not follow the outline exactly, but I have it as a guide to keep me on track. Using the scrolling bar on the very far right, I can glide up and down the snapshot as I write. That way, I can see whatever part of the outline shapshot I want.
8.
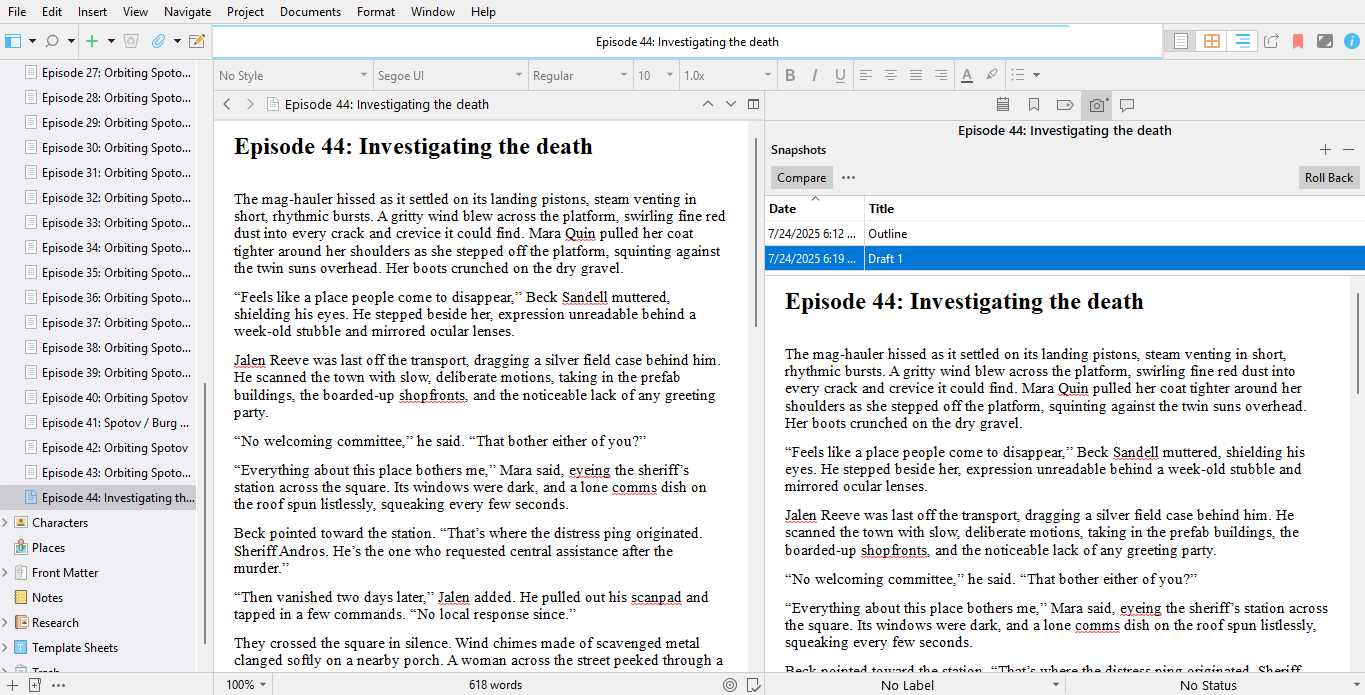
When I’m done with my first draft, I take a snapshot of it and it will appear beneath the listing of the snapshot called “Outline.” I name this new snapshot “Draft 1.” I don’t delete this draft because I’ll probably only make minor changes to it; however, each time I am about to make changes, I can choose to save the current version as a snapshot for later reference.
I can make as many snapshots for a document as I want. Past experience tells me I usually need to rewrite a scene three or four times. Of course, I can totally delete my scene in the editor and start over knowing I have snapshots of everything saved.
9.
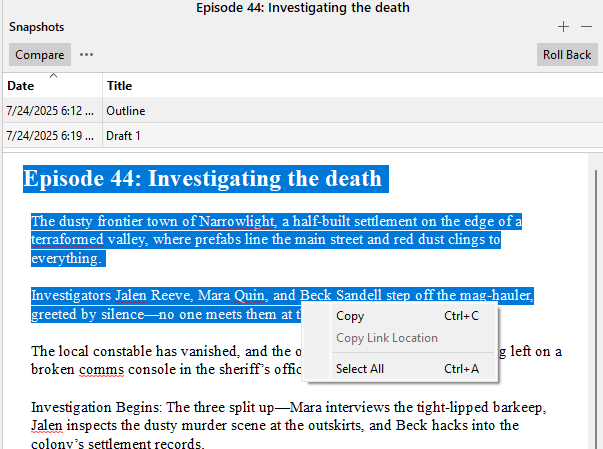
If I want to get text from a previous snapshot, click on the snapshot in the list. In this case, I want to get something from the snapshot called “Outline.” I select what I want to copy, right click, and select “Copy” or use Ctrl+C. For Mac users, use the keyboard shortcut Command (⌘) + C.
10.
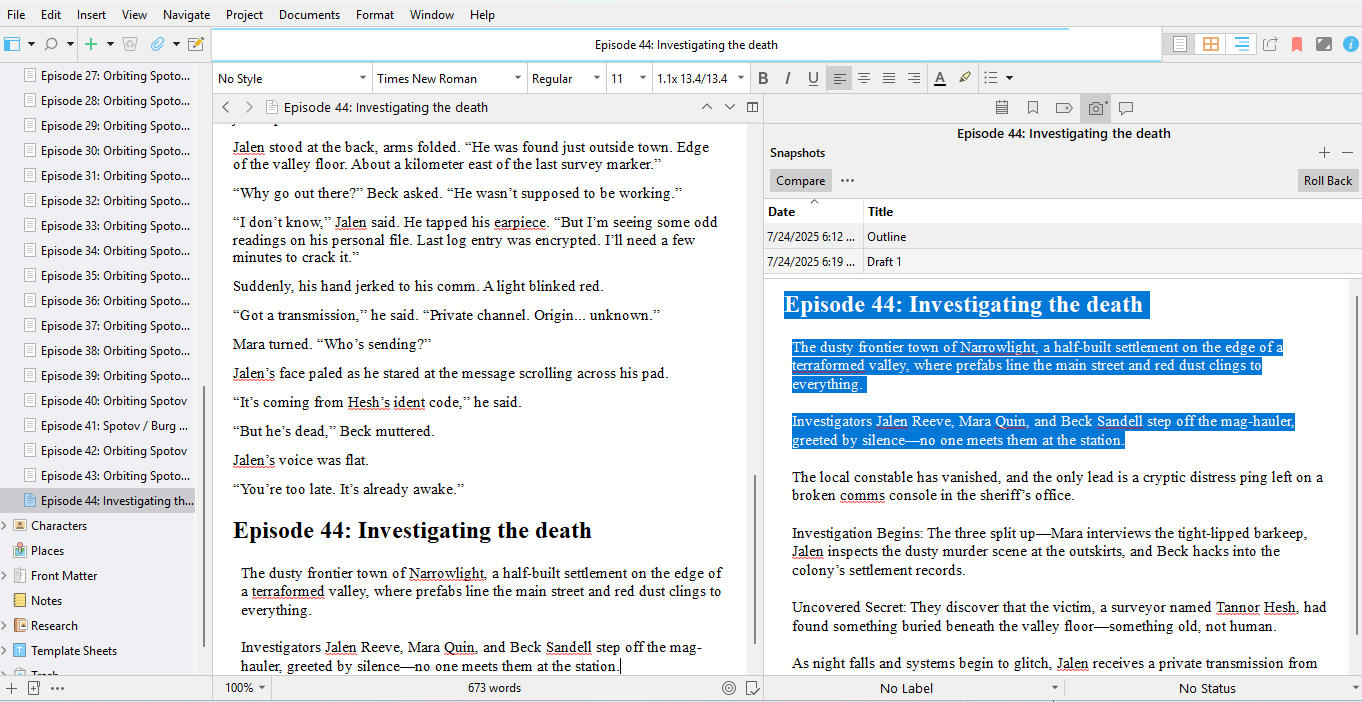
I paste what I copied into the editor column. I never know when I may need to copy and paste something from a previous snapshot.
Other writing software, like Novlr has a snapshot function. You might want to adapt whatever software you use to write to keep track of your revisions. I’ve discovered it’s always good to have a plan. Never throw an old draft away. You may have to glean a nugget of information from it when you least expect it.
Friday’s Findings
- Fiction University: 3 Ways to Add Tension to a Scene
- Bring Your Setting to Life
- Figurative Language: Types, Examples, and How to Use It
- 5 Tips To Write Faster: Finish Your Book In Record Time
- Writing Action: How Obstacle Course Racing and Love of Film Impacted My Action Scenes
Photo by cottonbro studio

Leave a comment